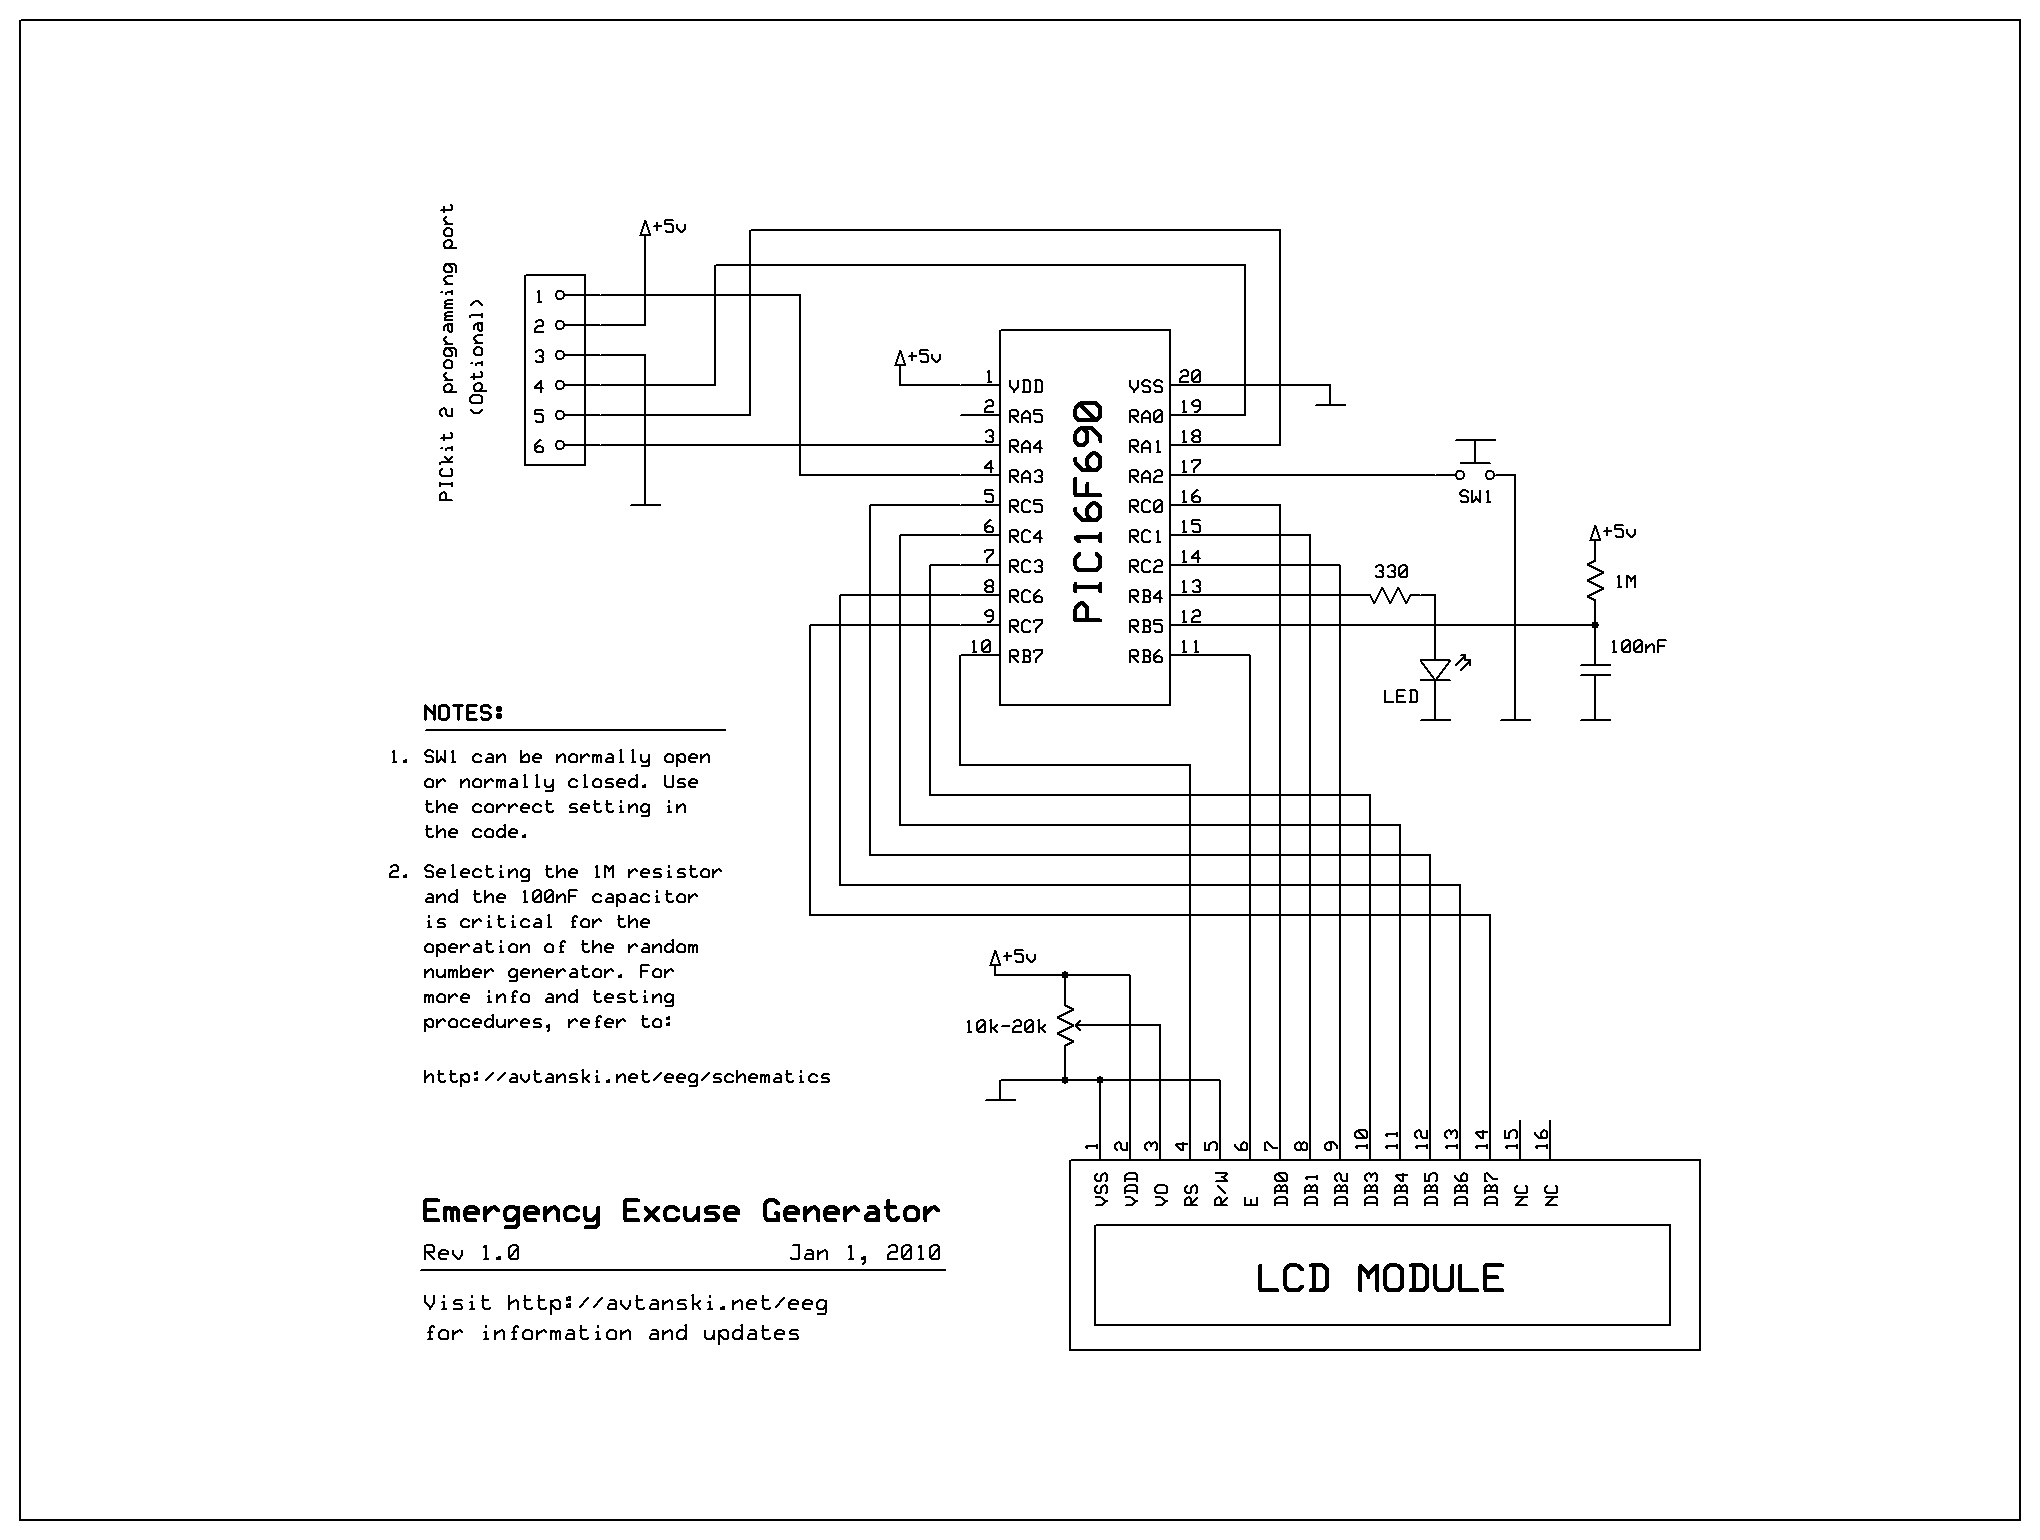
On this page you will find the code and schematics for the Excuse Generator.
Please, check the notes below for important information.
If you have any questions or issues with the code or schematics, do not hesitate to contact me - my e-mail address is on the bottom of each page of this site.
-
Using the Emergency Excuse Generator.
Turn the power on. The boot message will show up. Press the button and hold it down until the LED switches on. Releasing the button will generate an excuse. In case the text is too long to fit on the screen, the LED will stay on - pressing the button will show the remainder of the text. When the LED switches off, pressing and holding the button will generate the next excuse.
-
Power Supply.
I didn't include the 5V power supply on the schematics. For my project I used a 9V battery and a LM2940-5 voltage regulator, but you can as easily use a LM7805 or whatever 5V regulated supply you have handy.
-
Random Number Generator Circuit.
Most similar projects use the user input (for example, the length of time a button is down) to generate random numbers.
The button press time is used this way here too, but this is not enough for the Excuse Generator.
One can get just several random bits out of a single button press, and for this project we need a constant flow of random numbers, even with a low degree of randomness.
To deal with this problem I came up with the RC circuit connected to RB5.
Most of the time RB5 is configured as an output that keeps the capacitor discharged.
When a random number is needed RB5 is configured as a high-impedance input.
The capacitor starts charging through the 1M resistor, while the microcontroller
counts the elapsed time.
When the capacitor voltage reaches logical 1 level, the value of the counter is taken as a random number.
This works pretty well because the slow charging through the 1M resistor and the exact level at which logical 1 is detected by the microcontroller are quite noisy processes.
However, special care must be taken when choosing the capacitor and resistor.
I would recommend using a film/foil type capacitor- anything with low leak current.
Depending on your capacitor, you may have to use different resistor value.
Higher values will mean higher degree of randomness, but slower response time for the Excuse Generator.
-
Testing the Random Number Generator.
The device has a Test mode to verify that the random generator is operating properly.
If you hold down the button while powering the device, a stream of random characters in the range from "A" to "P" should start appearing on the screen.
If you don't see anything, this likely means the capacitor cannot charge properly (or that the display is malfunctioning, of course).
Try using a smaller resistor in place of the 1M Ohm one, or try replacing the capacitor with one with smaller leak current.
If you see a sequence of symbols appearing on the screen, but with low degree of randomness (for example, something like "
FFFFGGGFFFFF" instead of "AFFMECPMDPIC"), try increasing the resistor's value.
The slower the symbols appear, the better degree of randomness you should get.
This will make the Excuse Generator work slower too, so it is a tight balance.
In a pinch you can try attaching a long wire to RB5, between the resistor and the capacitor - this will act as an antenna and will add extra noise from nearby electromagnetic disturbances.
-
Using Different LCD Display.
The device has been tested with a 16x2 and 20x4 character LCD displays.
Please, pick the appropriate HEX file to download.
If you are using a display with different dimensions, please update the
LCD_ROWS and LCD_COLUMNS parameters in eeg.asm and recompile.
For some displays, you may also have to change the ADDR_ROW# parameters to reflect the memory address of the beginning of each row.
Refer to your display datasheet for information.
-
Using Normally Closed Button.
The
SW1 button on the diagram can be replaced with normally closed one.
If so, uncomment the #define BTN_NC line in eeg.asm and recompile.
-
IMPORTANT: Compiling with MPLAB.
Make sure that the MPLAB project is compiled with
Release (not Debug) build configuration.
From the MPLAB menu select Project -> Build Configuration -> Release.
Failing to do so will result in a memory problem at compilation time.
|
|